Google AdSense is an opportunity to share profits for small, medium and large sites that display ads for goods and services related to your site's content, and target people who visit your pages. In return, a small amount is paid when the ad is shown or clicked on your page.
The iFrame is an HTML tag which defines the inline frame. It is used for embedding an HTML document within an HTML document. In simple words, we can say that iFrame is used for displaying a web page within a web page. It is defined with <iFrame> tag. This tag is not associated with <frameset> tag and can be displayed anywhere in a document. It actually defines a rectangular region on a web page displaying a separate document including the borders and scrollbars. Using the iFrame HTML tag, yu can simply create an internal frame inside the document.
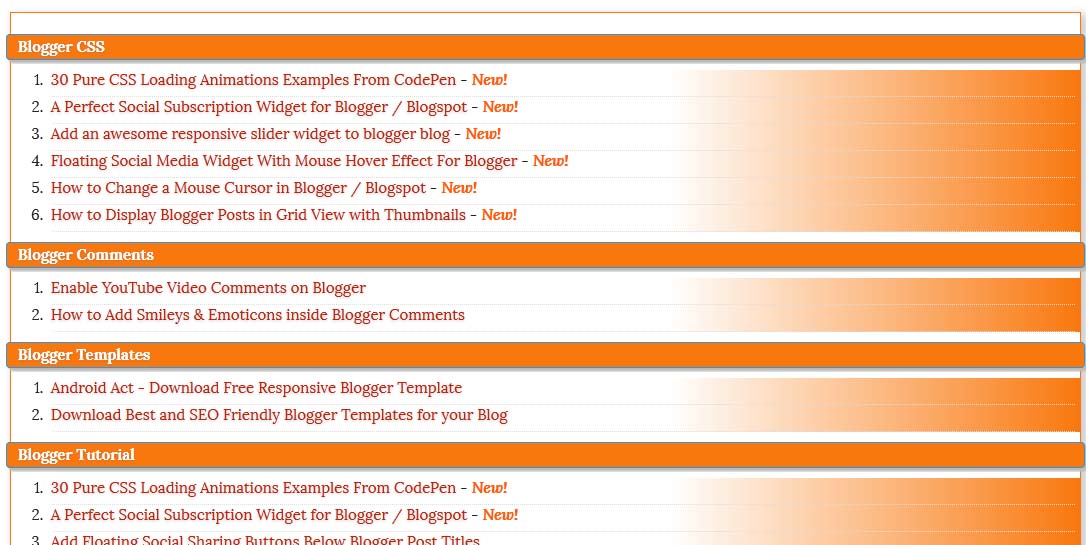
Today in this article we learn sitemap generator. One of the best benefits of adding a sitemap page to your blog is that it will make navigation easier and will also help improve SEO. How can it be useful to improve SEO? Well, this sitemap page will automatically associate your latest article with your tag, so it will help the search engine spider crawl all your articles and index the content and web page easily, besides this help Will do. To increase the pagerank of your blog. Because it creates many internal links. By the way, I have also set up the sitemap page in this blog, you can see how it works and looks before implementing it in your blog :)
How to create a sitemap page in Blogger?
To create a Sitemap page in Blogger, you must first create a page that you can do by navigating to pages from your Blogger dashboard, then click on the "New Page" option, then the page editor will be open. Put it in HTML mode and put the following code right inside. <style type="text/css">
#toc{
width:99%;
margin:5px auto;
border:1px solid #2D96DF;
-webkit-box-shadow:4px 4px 8px 2px rgba(0,0,0, 0.2);
-moz-box-shadow:4px 4px 8px 2px rgba(0,0,0, 0.2);
box-shadow:4px 4px 8px 2px rgba(0,0,0, 0.2);
}
.labl{
color:#FF5F00;
font-weight:bold;
margin:0 -5px;
padding:1px 0 2px 11px;
background:-moz-linear-gradient(right,#C2EAFE 0%,#055A85 40%);
background:-webkit-gradient(linear,left 10,right 80,color-stop(0.20,#055A85),color-stop(1,#C2EAFE));
border:1px solid #2D96DF;
border-radius:4px;-moz-border-radius:4px;
-webkit-border-radius:4px;box-shadow:3px 3px 1px #bbb;
-moz-box-shadow:3px 3px 1px #bbb;-webkit-box-shadow:3px 3px 1px #bbb;display:block;
}
.labl a{
color:#fff;
}
.labl:first-letter{t
ext-transform:uppercase;
}
.new{
color:#FF5F00;
font-weight:bold;
font-style:italic;
}
.postname{
font-weight:normal;
background:-moz-linear-gradient(right,#C2EAFE 0%,#fff 40%);
background:-webkit-gradient(linear,left 80,right 10,color-stop(0.60,#fff),color-stop(1,#C2EAFE));
}
.postname li{
border-bottom: #ddd 1px dotted;
margin-right:5px
}
</style>
<div id="toc">
<script src="http://makingdifferent.github.io/blogger-widgets/sitemappage.js" type="text/javascript"></script>
<script src="http://www.YourBlogURL.com/feeds/posts/default?max-results=9999&alt=json-in-script&callback=loadtoc">
</script></div> After adding the above code inside the page editor, replace "http://www.YourBlogURL.com" with the URL of your blog. And finally, click the "Publish" button and you're done!
That is, if you have any problem while implementing the sitemap page in your blog, please post your comment below and share your opinion on it. If you really like it and are going to use it on your blog, then share this article with your blogging friends. Thank you !
Are you using Google Adsense ads on your blog for generating revenue, but your CPC is too low?
Then here I have shared 10 tips to increase Adsense CPC to boost up your AdSense earnings
But before that let’s see what is CPC?
Page Contents
What Is CPC?
CPC or we can say Cost Per Click is the amount of money an advertiser pays to Google Adsense when someone clicks on their ads and generally 68% of that money is paid to you and the rest 32% is kept by Google Adsense
So for example, if Google Adsense is paid $2 for a click made from your blog for a certain keyword, then you will get $1.36 from it and the rest $0.64 is kept by Google Adsense
Now I hope that the concept of CPC is clear to you
So let’s move on and see how to increase Adsense CPC 10 Effective Tips To Increase Adsense CPC
1. Choosing Right Niche
The first thing before starting a blog is to select a niche to write about and choosing the right niche can help you to increase Adsense CPC
Blogs on a niche like Insurance, Gadgets, Cryptocurrency, Bankings, Healths get higher CPC than other niches
It is because advertisers bid higher on these keywords, as a result, the CPC that you will get is high
2. Optimize Your Contents For High CPC Keywords
Before writing a piece of content for your blog do keyword research and find the keywords that have high CPC within your niche
After you find such keywords optimize your content with those keywords in a natural flow.
So focus on keyword optimization and you will see a gradual increase in Adsense CPC
3. Make Use Of Longtail Keywords
It is a well known fact that now it is difficult to rank for short-tail keywords so you need to go for longtail keywords because longtail keywords are easier to rank as compared to short-tail keywords
It is essential because if you cannot rank for a keyword then you will not get traffic and Google Adsense is all about traffic
The more the quality traffic on your blog, the more the earnings from Google Adsense
Also Read:- The Importance Of Keywords In SEO
4. Focus On Targeting Certain Countries
Google Adsense CPC also depends on the country from where your readers come from
So if you are getting your visitors/readers from countries like United States, United Kingdom, Sweden then you will get more CPC as compared to countries like India
For example, if someone clicks your ads from USA you may get around $2 – $1 whereas a click from India can generate around $0.08 – $0.01
Hence you can focus on targeting certain countries to Increase Adsense CPC
5. Platforms
Generally, Platforms (Desktop, Tablets, Mobile Devices) does not affect Adsense CPC much, however, I have seen some cases where a click from mobile devices gets higher CPC as compared to desktop
Thus ensure that your website is mobile friendly and is accessible from mobile devices
6. Make use Of Ad Review Center
Ad review center is a tool on Google Adsense that allows you to decide the type of ads to be shown on your blogs
From here you can control the appearance of ads on your blog
Simply you can block the ad categories that are irrelevant to your niche
By doing this Adsense will only show the ads that are related to your niche, as a result, the chances of getting clicks on ads also become higher
7. Ads Placements And Ads Sizes
The size of ads and where you place them can also increase Adsense CPC
Try experimenting with different ad sizes and placements until you see an increase in Adsense CPC
Once you start getting high CPC then stick to that ad arrangement
You can also try placing 1 ad below blog title and 1 in the sidebar, as it works for most of the blogs
8. Show Relevant Ads
Make sure that Google Adsense serves relevant ads on your blog posts, and this can be done by making your blog posts SEO friendly, so that when Adsense crawlers came they can easily determine what the content is about
You can easily do this by adding your keywords in Headings, Meta Description, Permalinks and optimize your blog post with LSI keywords
Also Read:- How To Write A SEO Friendly Article
9. Language Used In your Blog
The language you use in your blog also affects your Adsense CPC and usually, blogs in English get higher CPC as compared to regional language
It is because English contents are easily crawlable and advertisers prefer to bid higher on them
Also Read:- Ad Targeting By Language
10. Try Experimenting With Adsense Ads
Keep on experimenting with different ad sizes, ad placements, block certain ad categories, etc
And remember to check whether the theme that you are using in your blog is responsive or not
If not then start using a responsive template that is easily accessible and viewable from desktop, tablets, and mobile devices
Using a responsive template can also result in an increase in Adsense CPC Conclusion
So basically these are the 10 Best Ways to Increase Adsense CPC
Try implementing these tips on your blog until you see an increase in Adsense CPC, and keep on experimenting with your ad units until you find the best arrangement of ads that work best for your blog
Hope you find this article helpful and if you have any question you can put them down in the comment section
Are you getting rejected from Google Adsense again and again, and searching for Adsense Approval Trick 2020
Then in this blog post, I have shared 10 Best Working Google AdSense Approval Trick that will help you to get fast Adsense Approval, for your Blogger or WordPress website
Adsense is one of the most trusted ad network, which is based on CPC (Cost Per Click) and CPM (Cost Per Mille), thus getting approval from Adsense is getting tougher day by day
But do not worry, this guide will help you to get Fast Adsense Approval
Page Contents
10 Best Working Google Adsense Approval Trick
Before I start, let me clear this, that platform (Whether it is WordPress Or Blogger) does not matter for Adsense Approval
As I heard many people saying that it was hard to get approval for Blogger Site, but they are totally wrong
So now let’s get back to our topic, Adsense Approval Trick
1. Get A Custom Domain Name
If you are starting a blog, then make sure to use a custom domain name, and avoid using subdomains like blogspot.com or WordPress.com
And try to use Top Level Domain (TLD) like .com, .in, etc, it not only help you in getting Adsense Approval but it also helps in ranking your blog posts
You can get a custom domain name from Namecheap, which also provides free whois guard with it
Beware not to use free domains like .tk or .ooo as you will never get approval with this now
2. Consider Using A Clean Template For Your Blog
Use a clean, mobile-friendly and simple looking theme for your blog, with a clear header navigation bar
If you are using WordPress I will suggest you, go with MyThemeShop Themes and if you are using Blogger check out these Best SEO Friendly Blogger Templates and AMP Blogger Templates
3. Write High-Quality Contents
Focus on writing quality contents, as the content is the most important factor for getting AdSense Approval
But do not copy articles from others, because AdSense is very strict when it comes to plagiarism
The articles that you write should be unique and genuine
Random Tip: Before applying for Adsense make sure that your blog contains at least 15-20 blog posts with an average of 600-1200 words in each post
Also Read:-How To Write A SEO Friendly Article
4. Add Important Pages To Your Blog
Make sure that you have added the following pages to your blog
About Us
Contact Us
Privacy Policy
Adding these pages increases the chance of getting approval from Google Adsense
And the privacy policy page that you will create must contain the information provided by Google AdSense here
5. Remove Other Ad Network
When you are applying for Adsense, ensure that you have removed other ad networks
Because when you have applied for Adsense and if they found that your blog was crowded with other ad network and it was difficult for them to review your website, then your application will be rejected
So it is always a good practice to remove other ad networks from your blog and make it clean and tidy before applying for Google AdSense
6. Do Not Use Copyrighted Images
If you are adding images in your blog posts, ensure that they are not copyrighted ones
You can also check this out: Best Websites To Get Copyright Free Images
7. Organic Traffic
Organic traffic is not a criterion for getting Google Adsense Approval right now
But to be in a safe position make sure that you are getting at least 5-10 visitors organically each day
Remember not to drive paid traffic to your blog instead, you can use social media to get initial traffic yo your blog
8. Use Languages That Are Supported By Adsense
Adsense only supports and serve ads to appropriate languages
You can visit here or check the list below to know that languages that are being supported by Google Adsense
9. Remove Unwanted Widget
Remove unwanted widgets from the sidebar that you really do not need
Your goal should be to make your blog clean and easy to navigate, as it increases the chance of AdSense Approval
The other benefit of removing unwanted widgets is that it makes your blog load much faster, and that can help in SEO
10. Domain Age
Google Adsense had introduced a policy that your blog/domain age should be 6 months in some locations like China and India before one can apply for Adsense
But it does not always apply, so if you think that your blog is ready, then you can apply anytime
At last, your blog will be reviewed by humans and if they found that your blog fulfills all their criteria then you can easily get Adsense approval
AdSense Approval Trick 2020: FAQ
How much does AdSense pay per 1000 views?
Well, it depends on many factors like CPC (Cost Per Click), CPM (Cost Per Mille), from where your visitors are coming. So there is no exact amount one can predict about what AdSense pay per 1000 views
How much traffic do you need for AdSense Approval?
There is no such traffic requirement for getting AdSense approval, but to be on the safe side ensure that you are getting at least 5-10 visitors per day organically
What is the minimum payout for AdSense?
You need a minimum of $100 to be eligible for a payout from AdSense
Conclusion
So these are the Best Working Adsense Approval Tricks that I follow personally and get approval from AdSense
You can do this too, just follow the mentioned rules
And do let me know in the comment section whether you get you Adsense approved or not
How to Setup Lazy Load for AdSense to Increase Blogger Speed in Google PageSpeed Insight
Table of Contents
Webpage Speed is a Google Ranking Factor
Increase Speed Using Lazy Load for AdSense
How to Setup Lazy Load for AdSense to Increase Blogger Speed in Google PageSpeed Insight
Webpage Speed is a Google Ranking Factor
AMP Blogger - The speed of a website page is one of the factors that determine to rank on Google. This is valid and has been mentioned in many forums held by Google.
Google is more concerned with the convenience of internet users than features in a website and makes the most relevant content that will become the first page on SERP.
To optimize website pages, Google has built a tool that can be used free of charge by Webmasters to maximize the rendering speed of websites. This tool is called Google PageSpeed Insight.
If you audit a website on Google PSI, you will get results that Google AdSense turned out to be blocking-rendering. That is, the Google AdSense ad script makes your website slow when rendered.
It is certainly detrimental to you and your visitors. But of course, there is a solution to the problem.
This time I will share a solution to speed up loading a website by using Google AdSense Lazy Load. This can maximize the rendering speed of a page that has a large number of ads.
Increase Speed Using Lazy Load for AdSense
I dedicate this tutorial to websites that use Blogger if you use another CMS, you just need to improvise it.
The first step, you should remove all this AdSense syndicate script.
Note: search one by one the above code, then delete.
Then copy and paste this script, right before </body>or</body>--></body>
<script type='text/javascript'>


//<![CDATA[


var lazyadsense=!1;window.addEventListener("scroll",function(){(0!=document.documentElement.scrollTop&&!1===lazyadsense||0!=document.body.scrollTop&&!1===lazyadsense)&&(!function(){var e=document.createElement("script");e.type="text/javascript",e.async=!0,e.src="https://pagead2.googlesyndication.com/pagead/js/adsbygoogle.js";var a=document.getElementsByTagName("script")[0];a.parentNode.insertBefore(e,a)}(),lazyadsense=!0)},!0);


// Lazy Load AdSense


//]]>


</script>
The script will render AdSense Ad if all the content has been rendered. So that it will speed up the speed of your blog, and maximize the score on Google PSI.
Read more: How to Add Google Tag Manager to AMP Blogger Page
The idea of Meks came to us after hours and hours of constant work. We want to make contribution to the world by producing finest and smartest stuff for the web. Look better, run faster, feel better, become better!
The idea of Meks came to us after hours and hours of constant work. We want to make contribution to the world by producing finest and smartest stuff for the web. Look better, run faster, feel better, become better!